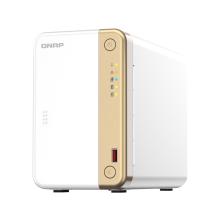
Data Recovery from Failed QNAP RAID 1 on a PC using Linux
It is possible to mount a single drive from a failed QNAP NAS RAID1 and recover the data (or 3 drives from a RAID 5).
This may be required when the QNAP NAS enclosure fails (and the drives are otherwise healthy) or when you only have access to the physical hard drives.
This is just the basic steps required.
Please email info@ripcaster.co.uk or call 01183218292 if you want us to perform this data recovery service for you.
See our YouTube version of this here:
You can do this directly with a Linux machine (Ubuntu LTS22 in this case), but here we are using a vitrual machine hosted on Windows 10 or 11 in VirtualBox.
NOTE: The steps outlined here are for Static traditional volumes only. See the end of this page for a solution for dynamik thin/thick volumes,
Equipment Required:
- Healthy Drive from a QNAP RAID1
- Windows Machine
- VirtualBox Installed https://www.virtualbox.org/wiki/Downloads
- Virtual Host of Ubuntu 22 LTS Desktop - minimal install, 30GB VDI - https://ubuntu.com/download/desktop
- USB hard drive caddy to connect the QNAP drive to the Windows PC
- USB pocket drive to recover the data to
Install Ubuntu in a virtual machine - minimal installation, 2GB RAM, 30GB virtual hard drive size.
Connect a single drive from the QNAP RAID1 to the USB craddy. Enable the USB as accessible from the Linux Virtual machine from the VirtualBox Devices menu once the virtual machine is running.
From the Linux console enter the following commands (if needed):
Install mdadm
sudo apt install mdadm
Install lvm2
sudo apt install lvm2
Install GParted
sudo apt install gparted
Now start the RAID with
sudo mdadm --examine --scan
Typical output
jon@U22$ sudo mdadm --examine --scan
ARRAY /dev/md/9  metadata=1.0 UUID=d05e0192:e906a9f0:a22db8b8:2ff6d177 name=9
ARRAY /dev/md/256  metadata=1.0 UUID=5c3d16fa:cdee43e3:684b9b18:63739c34 name=256
ARRAY /dev/md/1  metadata=1.0 UUID=ccef4995:069e2237:670a853a:f07049c0 name=1
ARRAY /dev/md/13  metadata=1.0 UUID=c15e5690:31581c85:e2ddd6e2:7a670d08 name=13
ARRAY /dev/md/322  metadata=1.0 UUID=7f1045ac:3b8c1bd8:eb115d05:240d27b2 name=322
List block devices
sudo lsblk
Typical output:
jon@$ sudo lsblk
NAME         MAJ:MIN RM   SIZE RO TYPE  MOUNTPOINTS
.
.
.
sdb            8:16   0   1.8T  0 disk
├─sdb1         8:17   0 517.7M  0 part
│ └─md9        9:9    0     0B  0 md
├─sdb2         8:18   0 517.7M  0 part
│ └─md256      9:256  0     0B  0 md
├─sdb3         8:19   0   1.8T  0 part
│ └─md1        9:1    0   1.8T  0 raid1
│   └─vg288-lv1
│            253:0    0   1.8T  0 lvm   /mnt/lv1
├─sdb4         8:20   0 517.7M  0 part
│ └─md13       9:13   0 448.1M  0 raid1 /media/jon/fdd88b1e-e934-4113-8f7e-c04858b76d2a
└─sdb5         8:21   0     8G  0 part
  └─md322      9:322  0     0B  0 md
sdc            8:32   0    30G  0 disk
├─sdc1         8:33   0     1M  0 part
├─sdc2         8:34   0   513M  0 part  /boot/efi
└─sdc3         8:35   0  29.5G  0 part  /var/snap/firefox/common/host-hunspell
                                        /
sr0           11:0    1  58.3M  0 rom   /media/jon/VBox_GAs_6.1.18
LIst the Raid structure
sudo cat /proc/mdstat
Typical output
jon@U22:~$ cat /proc/mdstat
Personalities : [raid1] [linear] [multipath] [raid0] [raid6] [raid5] [raid4] [raid10]
md322 : inactive sdb5[1](S)
      8353780 blocks super 1.0

md256 : inactive sdb2[1](S)
      530124 blocks super 1.0

md13 : active raid1 sdb4[1]
      458880 blocks super 1.0 [32/1] [_U______________________________]
      bitmap: 1/1 pages [4KB], 65536KB chunk

md9 : inactive sdb1[1](S)
      530108 blocks super 1.0

md1 : active raid1 sdb3[1]
      1943559616 blocks super 1.0 [2/1] [_U]

unused devices: <none>
Start the Raid (if needed using the name of the largest number of blocks in the raid - i.e. md1 in this example)
sudo mdadm --run /dev/md1
Find the Physical volumes (ignore warnings):
sudo pvdisplay
Example output:
jon@U22:~$ sudo pvdisplay
[sudo] password for jon:
  WARNING: PV /dev/md1 in VG vg288 is using an old PV header, modify the VG to update.
  --- Physical volume ---
  PV Name               /dev/md1
  VG Name               vg288
  PV Size               1.81 TiB / not usable 2.90 MiB
  Allocatable           yes (but full)
  PE Size               4.00 MiB
  Total PE              474501
  Free PE               0
  Allocated PE          474501
  PV UUID               Z6ozqW-XfGk-JEiS-QKgm-N4bA-GC7x-ef9C8w
Display attributes of the required volume
sudo vgdisplay vg288
Example output
jon@U22:~$ sudo vgdisplay vg288
  WARNING: PV /dev/md1 in VG vg288 is using an old PV header, modify the VG to update.
  --- Volume group ---
  VG Name               vg288
  System ID
  Format                lvm2
  Metadata Areas        1
  Metadata Sequence No  85
  VG Access             read/write
  VG Status             resizable
  MAX LV                0
  Cur LV                2
  Open LV               1
  Max PV                0
  Cur PV                1
  Act PV                1
  VG Size               1.81 TiB
  PE Size               4.00 MiB
  Total PE              474501
  Alloc PE / Size       474501 / 1.81 TiB
  Free  PE / Size       0 / 0
  VG UUID               VZAz2q-LrA1-BXL9-CHgh-9a2E-ZNSs-bDPW72
Identify the logical volumes:
sudo lvdisplay
Typical output (ignore warning):
jon@U22:~$ sudo lvdisplay
  WARNING: PV /dev/md1 in VG vg288 is using an old PV header, modify the VG to update.
  --- Logical volume ---
  LV Path                /dev/vg288/lv544
  LV Name                lv544
  VG Name                vg288
  LV UUID                5OWNV3-xCm1-NOS8-gngz-nEbC-JPYq-U8lRB2
  LV Write Access        read/write
  LV Creation host, time NAS09E629, 2018-03-16 18:26:35 +0000
  LV Status              NOT available
  LV Size                <18.54 GiB
  Current LE             4745
  Segments               1
  Allocation             inherit
  Read ahead sectors     8192

  --- Logical volume ---
  LV Path                /dev/vg288/lv1
  LV Name                lv1
  VG Name                vg288
  LV UUID                ldyh08-tsxE-LxdF-rcWi-2TgB-2XWY-RPVzhr
  LV Write Access        read/write
  LV Creation host, time NAS09E629, 2018-03-16 18:26:42 +0000
  LV Status              NOT available
  LV Size                1.79 TiB
  Current LE             469756
  Segments               1
  Allocation             inherit
  Read ahead sectors     8192
Active the required volume (largest data partition contains the data)
sudo lvchange -ay /dev/vg288/lv1
Make a mount pount
sudo mkdir /mnt/lv1
Mount the volume (read only):
sudo mount -t ext4 -o ro /dev/vg288/lv1 /mnt/lv1
Check you can see the data:
sudo ls /mnt/lv1
Output should show familiar QNAP shared folders:
jon@U22:~$ sudo ls /mnt/lv1
aquota.user  Download  homes  lost+found  MinimServer  Multimedia  Public  Web
Mount the USB drive, (if needed - sdc1 in our example - use fdisk -l to display drives)
sudo mkdir /mnt/usbdrive

sudo mount /dev/sdc1 /mnt/usbdrive
Copy the data to the recovery media (already mounted on usb in this example)
sudo cp -rvup /mnt/lv1/Multimedia /mnt/usbdrive
Once the copy has completed you can close down the virtual machine.
If you want to disconnect the drive from the running machine:
sudo umount /mnt/lv1

; make inactive the logical volumes shwon by lvdisplay
sudo lvchange -an /dev/vg288/lv1
sudo lvchange -an /dev/vg288/lv544

sudo vgchange -an vg288
; sometimes you may have other partitions automatically mounted off the drive (after running gparted)
sudo umount /dev/md13
;then stop
sudo mdadm --stop /dev/md13
sudo mdadm --stop /dev/md1
Storage Pools and Dynamically Allocated Volumes
The method outlined above works with Static Volumes only.
Dynamically allocated storage pools/volumes use custom QNAP code that is not available in general Linux operating systems (Surely QNAP should make this Open Source?).
e.g. Storage Pools with "On-demand Space", "Preconfigured Space" and "Traditional configuration" options in the Volume Creation Wizard in QNAP.
One solution to data recovery from these volumes is as follows:
- Install Proxmox on a bare metal Intel computer (old PC)
- Install QNAP NAS as a virtual machine within Proxmox e.g. TS-1685 (YT: "How to install QNAP NAS on Proxmox in pc")
- Edit ./my_create_qnap_boot as follows:
MODEL_TYPE="QY380_QY390_10_11"
PATCHED_FIRMWARE="TS-X85_20211114-5.0.0.1853"
DOWNLOAD_URL="https://eu1.qnap.com/Storage/TS-X85/"- Physically connect the drives from the failed QNAP to the SATA ports on the Proxmox computer
- List the drives attached to Proxmox with
-
ls /dev/disk/by-id
-
- Logically attach the required drive(s) to the QNAP NAS virtual machine e.g.
-
qm set 100 -ide3 /dev/disk/by-id/<disk id>

e.g. to logically connect a drive with id ata-WDC_WD40EFRX-68N32N0_WD-WCC7K7ZRN81E to IDE virtual port 3 (0..4) would be:

qm set 100 -ide3 /dev/disk/by-id/ata-WDC_WD40EFRX-68N32N0_WD-WCC7K7ZRN81E
-
- Boot the QNAP virtual machine
- Open Storage Manager -> Disks/VJBOD
- Selet the drives added above. Click the Recover button
- The drives should then be mounted and able to read the data off the drives.
I may get around to making a video about this if there is any demand...
- MOON 891 Network Player/Preamplifier
- MOON 791 Network Player/Preamplifier
- MOON 780D V2 Streaming DAC
- MOON 681 Network Player/DAC
- MOON 680D Streaming DAC
- MOON 390 Preamplifier Network Player DAC with HDMI
- MOON 390 Preamplifier Network Player DAC
- MOON 280D Streaming DAC
- MOON MiND 2 Network Player
- MOON 650D DAC and CD Transport
- MOON 260D CD Transport with optional DAC